How to Tune Up Your Bike
No matter how often you ride you should give your bike a tune-up at least once a year.
Today we’ll learn how to tune up your bike, which I’d recommend doing at least once a year, or even every few months if you ride every day. Since I can’t demonstrate every step of the procedure while keeping this video short, I’ll give a general overview and cover each step further in separate tutorials. You’ll notice below that I’ve written out all of the steps and included links to related tutorials. I’ll be adding new links as future videos are uploaded.
Depending how much work is needed you’ll need a several tools for this job. Most importantly you’ll need:
- Dish soap, water and some rags.
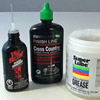
- Chain oil and a light lubricant like Tri-Flow.
- An air pump and tire pressure gauge.
- A set of metric allen wrenches (4-8mm).
- A set of metric open-end wrenches (8-17mm).
- Two 13mm and two 15mm cone wrenches.
- A set of appropriate sized headset wrenches.
- A spoke wrench for wheel truing.
- A chain wear indicator – Alternate Method.
- A repair stand or some rope to hang your bike from the ceiling.
Wheel Cleaning and Tuning
First disconnect your brakes and remove both wheels. This makes it easier to clean the bike frame and tune-up the wheels. Clean between the sprockets of your freewheel or cassette using a rag or a proper cleaning tool. Using a dry rag, wipe down the hubs, spokes, and rims on both wheels. If they are difficult to clean dip your rag in some mildly soapy water and try again. Never use harsh cleaners or a water hose to clean your bike. Check both hub adjustments to make sure they aren’t loose and that they spin freely. Adjust or overhaul them as necessary.
If you have a truing stand, deflate the tires and check the alignment and spoke tension of both wheels and adjust them as needed. Inflate both tires to the recommended pressure and set them aside.
Frame Cleaning
Now wipe down your entire bike frame and components. I usually start at the handlebar and work my way to the rear derailleur in order to keep my rag clean as long as possible. Again you can dampen your rag with soapy water if needed to loosen up any tough grime.
Frame and Parts Inspection
Once clean it’s a good idea to carefully inspect the entire surface of your frame for any hairline cracks or damage. If you notice anything you should take it to your local shop right away for further assessment, as it can be dangerous to ride on a cracked frame. Inspect all of your components as well, paying particular attention to the brake and shift cables. If they are frayed or have damaged housings, now is the time to replace them.
Lubrication
Now apply a few drops of some light lubricant to the inside of your cable housings and all of the pivot points on your brake and shift components. Avoid getting any oil on your brake pads, and wipe off any excess so that it doesn’t collect dirt. Here’s a video that demonstrates cable lubrication.
Headset and Bottom Bracket
Check the adjustment of both your headset and bottom bracket to make sure they aren’t loose and spin smoothly.
Brakes
Inspect all of your brake pad surfaces and carefully trim away any wear ridges with a razor blade. Resurface them with rough sandpaper to clean up road grime. You should replace the pads if they are worn past the indicator line, or if you can see metal poking through the surface. Watch the brake tutorials.
Tightening
Now check all of the bolts on your bike to make sure they’re tight, but be careful not to over-tighten. If they already feel tight enough don’t force them any tighter. Important areas to check include your handlebars, levers, shifters, stem, seat, seatpost, brakes, derailleurs, cranks and pedals.
Here is a bicycle torque specification guide from Park Tools.
Final Adjustments
Now reinstall the wheels and reconnect your brakes. Adjust the brake pads and cable tension as needed. Clean the chain, check for chain wear, and then lubricate it with chain oil. Then adjust the rear derailleur first, and the front derailleur second. Now place the bike on the ground and adjust your handlebar and seat position if needed.
Test Ride
The last step is very important. Take your bike on a thorough test ride, running through all of the gears and testing the brakes. Most of the time you’ll have a few minor re-adjustments to make before your bike is fully ready to ride.
Related Links
Recommended Tools
- Park Tool SK-3 Starter Mechanic Tool Kit
- Park Tool PK-3 Professional Tool Kit
- Park Tool PCS-9 Repair Stand
- Park Tool PCS-4 Repair Stand
- Park Tool TS-8 Home Truing Stand
- Park Tool TS-2.2 Home Truing Stand
Categories
Discuss this topic in the Bicycle Repairs and Mechanics Forum
Rear v-brake repair
Latest post 3 days agoHi everyone, I'm new here and I've been trying to avoid taking my bike to a mechanic and save some money. I succesfully fixed my front but struggle with the rear, I got new brakes for the rear. I notice i think it might be the housing causing the noodle to be off centered and making the left brake pad to close to the rim. Any help would be greatly appreciated, thanks!! My next project is to attemp...
Read moreCustom Bike part manufacturing
Latest post 4 weeks agoHello, Not sure if I should post this in buying advice or repairs, but here we are. I recently bought Schwinn cruiser an old one and I can't find the rear dropout bracket replacement. So I decided to try out a custom bike part manufacturer. Still waiting for my part, so if anyone has tried out a custom on demand manufacturer, please share your experience....
Read moreRemoving and refitting rear wheel on belt drive bike?
Latest post 1 month agoI have a Gazelle Esprit belt drive bike with hub gears which has a rear puncture. Can someone advise me on how to remove and refit the wheel? I'm aware that it can be quite complicated, but I have no option other than tackling it myself. The photos were taken with the bike upside down. IMG_20250122_105320.jpg (Size: 77.51 KB / Downloads: 50) IMG_20250122_105428.jpg (...
Read moreBest way to thoroughly clean a chain?
Latest post 2 months agoHi everyone! I hope you're enjoying a great start to 2023. I'm curious to hear your go-to method for getting a chain truly clean. I don't mean, just looks shiny or is good enough for a quick clean after a ride. I want to know what you do when you want to get every last morsel of ground-up, link-destroying, roller-eating, tooth-gnashing crud out of your chain. The Best Chain-Cleaning Recipe Ever?...
Read moreWhat jockey wheel Red 10 Speed
Latest post 2 months agoCan anyone advise what type of replacement jockey wheel I need for a 10 speed Red rear mech (it's got 11 teeth)? Bonus points if it's a link to a cheap (ish) one! Thanks...
Read moreGrip Shifters
Latest post 2 months agoCurrently renovating a child's bike. It has 24 inch wheels and is a suitable size for a 7-10 year old. Anyway it has grip shifters. it is a six speed with three chain rings on the front derailleur. On the rear derailleur the shifter does not appear to move the gear cable at all when shifting from 6 to 5 and 5 to 4. I am actually holding the cable with my finger and thumb against the cable cas...
Read more9 speed chain on 8 speed bike
Latest post 2 months agoAll of my bikes are 7 or 8 speed and sometime in the past I bought a 9 speed chain for some unremembered reason. is there any reason not to use it on an 8 speed bike?...
Read moreOperation of Santa Monica Ebike
Latest post 3 months agoHello - new owner with an How to Operate the bike question. Hopefully, this is easily answered I Bought this bike a few weeks ago - Tested many bikes and finally landed on this particular Santa Monica. However, got busy with Christmas shopping, Life, and not so great weather days distracted me from riding. I also test drove so many that I forgot how to operate it.... I "thought" I remembered, ...
Read moreGears and derailleur misalignment
Latest post 3 months agoMy Trike.jpg (Size: 57.65 KB / Downloads: 50) Wife Trike.jpg (Size: 60.74 KB / Downloads: 50) Although I have ridden bikes on and off since a kid (75 years old now), I have very little experience with anything other than a single speed bike. I recently purchased a new 7-speed Gospel adult tike, which needed assembly. My wife has the same model trike but older and p...
Read moreHow often check or change mechanical disc brakes
Latest post 3 months agoI'm curious—how often or after how many miles do people typically check or change their mechanical disc brake pads? I've been bikepacking for a while but never really followed a maintenance schedule. A few weeks ago, I took my bike to a mechanic because I heard some noise. The mechanic did a quick overhaul, and I was sent on my way. However, a few weeks later, while descending steep hills, I s...
Read moreShifting is almost impossible
Latest post 4 months agoMy wife's road bike has Shimano Sora shifters with a triple front derailleur (stock). The thumb switch on the front shifter is VERY hard to use and she can't do it when she's riding. I did a full adjustment of the front derailleur but it didn't change anything. One thing that I noticed is that the shifter works smoothly when the shifter cable is unattached from the derailleur, suggesting that the ...
Read more7-speed bicycle with bent rim
Latest post 5 months agoI recently bought a 7-speed bicycle practically brand new it still has a little rubber nipples on the tires apparently it got backed into in the garage and it bent the rear rim sideways my question is can I go out and buy another just like single speed 20 inch bicycle and put the 7-speed cassette onto that rim?...
Read moreTrek domane tyre
Latest post 5 months agoHi I have a trek domane 2.3, and I have changed the rear tyre to 28 (it was 25 originally) The tyre rubs with the brake arm (v brake), I fear it doesn’t seem to be compatible Is there any way to adjust the position of the brake arm? I just need it to ne around 2mm higher Thanks...
Read moreSchwinn meridian rear drive axle
Latest post 5 months agoRecently bought a slightly used 26" meridian trike. While replacing wider tires on the rear, I noticed an issue with the rear drive side wheel hub. The wheel is held on with a nut and single washer. The hub is not held firmly in a location on the axle and is able to slide back and forth on the axle a good half inch even though the nut is tightened all the way down to its bottom threads on the axle...
Read moreBianchi Oltre Pro Garmin Mount
Latest post 6 months agoI am wondering if anyone can help me with the garmin mount that came with my recently purchased Bianchi Oltre Pro. I was on a ride descending and the mount flew off, landing in the middle of the road with my garmin head unit. Luckily the head unit still works with a few minor scratches and cracks. From the picture you can see that it was not that the screws came loose, it was in fact the part of ...
Read more